
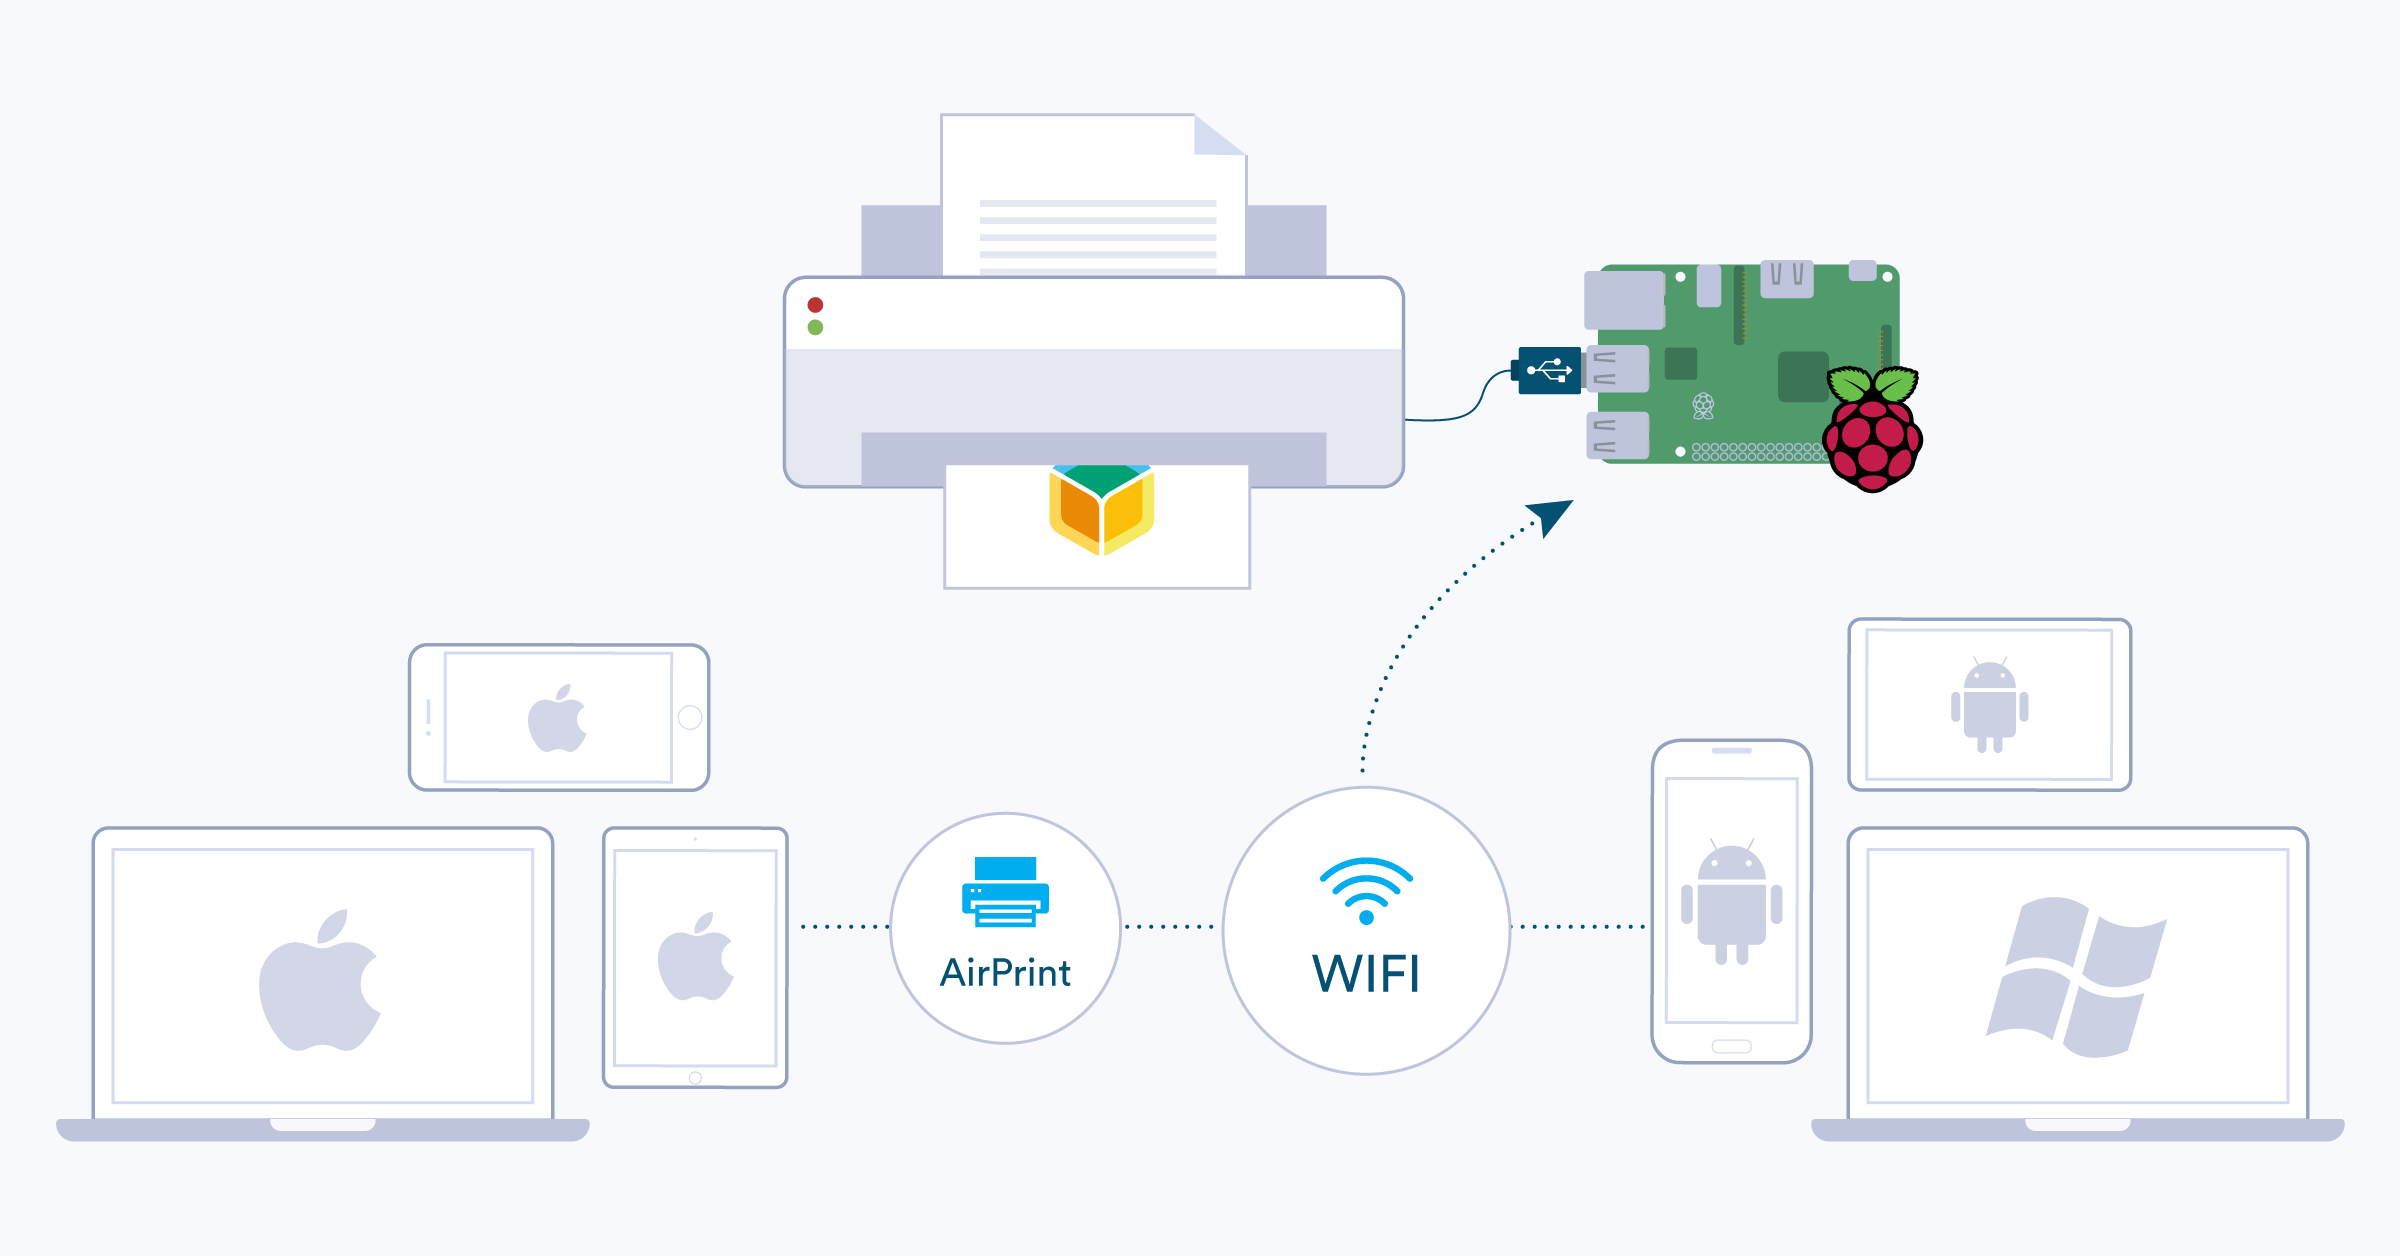
Do you have a printer that only connects using USB? Wish you could print from your phone, tablet or a computer from another room? Turn a Pi into an AirPrint-friendly printer server!
This guide will walk you through setting up and sharing your printer using a Raspberry Pi so you can print wirelessly from any device in your home network.
Before you start
Introduction
Despite our efforts to live a _paperless_ lifestyle, there are situations where we might need to get some document printed out: It might be printing a quick poster for a missing pet 😔, some urgent legal document, or maybe you took an awesome photo outside and want to print it right away!

If you want to add wireless printing capability and AirPrint support to a USB printer, then this guide is for you. Use this project to remove the hassle of copying documents to a dedicated computer where the printer is connected. Bonus: spare yourself the time of configuring drivers across several devices in your home or your own office and avoid even considering expensive office purchases like this. Also, Airprint support means you can easily print from your Mac, iPhone, iPad, or iPod touch without having to install additional software.
This guide uses balena-cups, a project by one of our awesome balena Community Members, Will Walker(@willswire). It installs CUPS on the Raspberry Pi and configures it as a printing server. Here’s some background by Will on why he worked on the project:
I originally set out to provide AirPrint functionality to legacy printers so that many of our Facilities employees could print directly from their iOS devices. Many applications used by Facilities personnel deal with maintenance/operations applications and require printing. Using this project, I was able to set up balenaOS provisioned devices as printer-server proxies between our printers and the iOS devices our techs use
– Will Walker(@willswire)
Let’s get started!
Hardware required
- Your printer of course 🙂 (with power and usb cables)
- Raspberry Pi ( We recommend Pis with USB-Type A ports so you can connect your printer directly. If you use a Pi Zero W, you will need an adapter )
- A 4GB or greater micro SD Card (we always recommend SanDisk Extreme Pro SD cards)
- Power supply
.png)
Software required
- Software to flash an SD card (we recommend balenaEtcher)
- A free balenaCloud account to setup and manage the Pi
- (optionally) balenaCLI if you’re an advanced user who wants to hack on your devices, work locally, etc.
Tutorial
Setup the app and deploy the code to your Raspberry Pi
Once you’ve found all the hardware and prepared all the software, we’re going to start setting up the Raspberry Pi.
Sign up for a free balenaCloud account
Sign up for a balenaCloud account if you haven’t done so already. You can use an existing GitHub or Google account as a single sign on method as well.
Click this button to create the application and deploy it
Then click Create and Deploy.

This will create an application with all of the balenaPrint code already deployed and pre set all of the configuration settings.The application will be named balena-cups but you can change it to anything you like.
Alternatively, you can clone the project repo and push it to your balenaCloud application using balenaCLI.
Add a device and download the balenaOS disk image from the dashboard
Clicking the ‘Add Device’ button to add a new device to your application. Note: when you add a device, you must specify your device type, which creates a customized image configured for your application and device type, and includes your network settings if you specified them.

Note: When you’re first getting started, a development image will be most useful, as it permits a number of testing and troubleshooting features. More details on the differences between development and production images can be found here. If you’re confident you can go ahead and deploy the production image straight away.
Flash your SD card with the balenaOS disk image and boot the device
Once the OS image has been downloaded, it’s time to flash your SD card. You can use balenaEtcher for this.

Once the flashing process has completed, insert your SD card into the Raspberry Pi and connect the power supply.

When the device boots for the first time, it connects to the balenaCloud dashboard, after which you’ll be able to see it listed as online and move onto the next step.

Troubleshooting: It should only take a few minutes for the new device to appear in your dashboard. If your device still hasn’t shown up on your dashboard after a few minutes, something has gone wrong. There’s an extensive troubleshooting guide in the documentation, with lots of information on why this could be, but if you still can’t get your device online, come on over to the forums where we’ll be able to help out.
If everything worked out correctly, after a few minutes your device information screen in the dashboard should look something like this, showing the cups service running.

Yay! Now you are ready to connect your Pi and printer and give it a try!
Connect your printer
To connect your printer to your Raspberry Pi, you need to make sure you have the proper cable. Most printers use USB 2.0 A Male to B Male

Source: Andrew.cudzilo | wikimedia
Connect the printer and Raspberry Pi. Power on your printer.
Configuring CUPS
balenaPrint uses CUPS. CUPS is an open-source printing system that allows a computer to act as a printing server on the network. In our case, the Raspberry Pi is running CUPS and provides a common interface for other client devices on the network to use the printer.
CUPS provides a web interface for administration.
Before we can access it, we need to enable the balena public URL feature to provide a simple, secure path access to the CUPS administration interface. This will also allow you to access the web interface remotely.
Enable the PUBLIC DEVICE URL feature by clicking the switch on your device’s dashboard. A link with an arrow will appear that opens a new browser tab. That is the URL anyone can use to access the CUPS web-based administration interface! So make sure to keep it private.

Add a printer
Before we can start printing, we need to configure our printer in CUPS.
Go to the Administration tab and then click “Add Printer” from the Printers section:

The steps to configuring a printer start with selecting a printer from the list of detected printers:

🏁 Checkpoint 1️⃣: Selecting the printer to be configured
We will be adding a local printer since it is connected to the Raspberry Pi via the USB cable. If your printer does not show up in the list, make sure to power the printer on and reload the page. If it still does not show up, try rebooting the Raspberry Pi with the printer still connected.
Select your printer and click continue. We’ll now add descriptions for the printer.

Give a name and description for your printer so that it is easily identifiable when clients are connecting. Make sure to share the printer. Select the driver for interacting with the printer.

CUPS requires proper drivers to be able to communicate with your printer.
balenaPrint comes with some free drivers from the foomatic project and hplip already. Foomatic is a database-driven system for integrating free software printer drivers while hplip provides support for some additional popular HP printers.
However, given the numerous brands and models out there, it is impractical to have all the drivers built in. Moreover, there are some printers that require proprietary drivers and firmware to function properly. So there is a chance that your printer model is not listed or requires proprietary plugins or firmware!
🏁 Checkpoint 2️⃣: Is your printer listed and doesn’t require proprietary plugins?
Yes: Select it and click on ‘Add Printer’ then move to the next section(setting printer default options).
No, it requires proprietary plugins: this requires manually installing the drivers and plugins (we’ll have a separate guide for this workflow out soon).
No, it is not listed: If your printer is not listed such as the Samsung C48x you will need to add the required driver software for that. Continue below
Finding and configuring printer drivers can be quite daunting. Drivers can be packaged into different formats. The most popular format is PPD and it is the easiest to install with CUPS.
You can look online for drivers for your printer model. Thanks to the Open Printing Project, this process is a lot easier than it once was. You can search for your printer on this site.
For instance, for the Samsung C48x:

🏁 Checkpoint 3️⃣: Is your printer driver available as a PPD file?
No: If there are no PPD files for your printer, this requires manually installing the drivers.
If yes: Continue with PPD file uploading below.

As you can see in the above image, We can download the PPD file for the Samsung c48x printer.
The recommended drivers section provides the ppd file. Download it and save it on your computer. Go back to the CUPS administration in your browser and provide the PPD file then click on ‘Add Printer’.

Set Printer Defaults
At this point, your printer driver should be configured and the printer added.
Next step is to set default options for your printer.

Set the options for your printer and click on ‘Set Default Options’.
🏆 Great, now that the printer is set up, we can try to connect to it from client devices!
Give it a try
Once you’ve got your printer configured, you’re ready to go! You can try printing from any device on your network. We have tested with iOS devices, macOS, Android and Windows.
iOS and macOS
balenaPrint comes with Airprint support which means that your printer will work seamlessly with your Apple devices. Your printer should be discovered automatically. (If not please make sure you shared your printer).
On iOS you can send a print job from any compatible application by clicking the “share” icon. Check the Apple Support documentation for more details.

On macOS, you must add your printer to the list of printers using Printers & Scanners preferences. macOS uses AirPrint to connect to the printer or automatically downloads the printer’s drivers. You can consult “Add a printer on Mac” for more details.

Android
Your android device probably comes with a print service. A print service is responsible for discovering printers, adding discovered printers, removing added printers, and updating added printers.
From your application, you can tap “Menu” or “More”, and then tap Print.
<span class=”screenshot”

If you don’t have a print service installed, check the Android Help on how to add a service. It will guide you through installing a print service such as Mopria Print Service or CUPS Printing.
Windows
-
Get the printer URL
The easiest way to get the URL is to navigate to the printer’s page from the CUPS administration page. Click on the “Printers” navigation link and select the printer you set up. Copy the link from the browser, it should be in the form:
<public url>/printers/<queue name> -
Now we need to add a Printer in Windows 10. Click on Devices and Printers in Control Panel. This should bring up the following window:

-
Click on Add a Printer and it will bring up the following window:

If your printer is listed after the search is complete, select it and finish the installation process. However, if like me the window shows No device found after the search, click on “The printer that I want isn’t listed” and it will bring up the following window:

-
Click on the option “Select a shared printer by name” and paste the printer URL we copied in step 1 of this section and click next.

-
Windows will prompt you to configure the driver for your printer. Choose your printer model from the list:

-
Your printer should now be listed on your computer!

Let us know what you think
We hope you find this post useful, and be sure to let us know in the comments, on our Forums, or via Twitter if you build this project! We’d love to see some pics of your setup!
As a final note, as mentioned above, this project was originally designed and built by Will Walker, and it’s with his generous permission and his assistance that we’ve turned the project into a full tutorial. Be sure to star his GitHub repo, say thanks, or give him a shout-out for his amazing work!
Hello @forgivensinner welcome to the balena community.
I checked the project and i’m not sure it’s compatible with Raspberry Pi zero. Do you have a Raspberry Pi 3 to test with?
Let us know if this works!
@jliu @ro-761
Have you tried one of the generic PPDs that CUPS offers?
everywherePPD a try.HP LaserJet SeriesPPD a try instead.If it works (or you find another way to get the needed driver) please do share for others’ knowledge!