
Last updated: 6th October 2020
Turn your spare Raspberry Pis and speakers into a fleet of synchronized multi-room audio players. You can start from scratch or upgrade an existing balenaSound device to add the multi-room functionality for free!
Before you start
Updates
We’re continually updating this post along with the project code, you can find a log of all our updates below.
- 6th October 2020: Updated instructions for balenaSound v3.0
- 7th July 2020: Added Deploy with balena method and links to official app site for docs, troubleshooting, and more.
Introduction
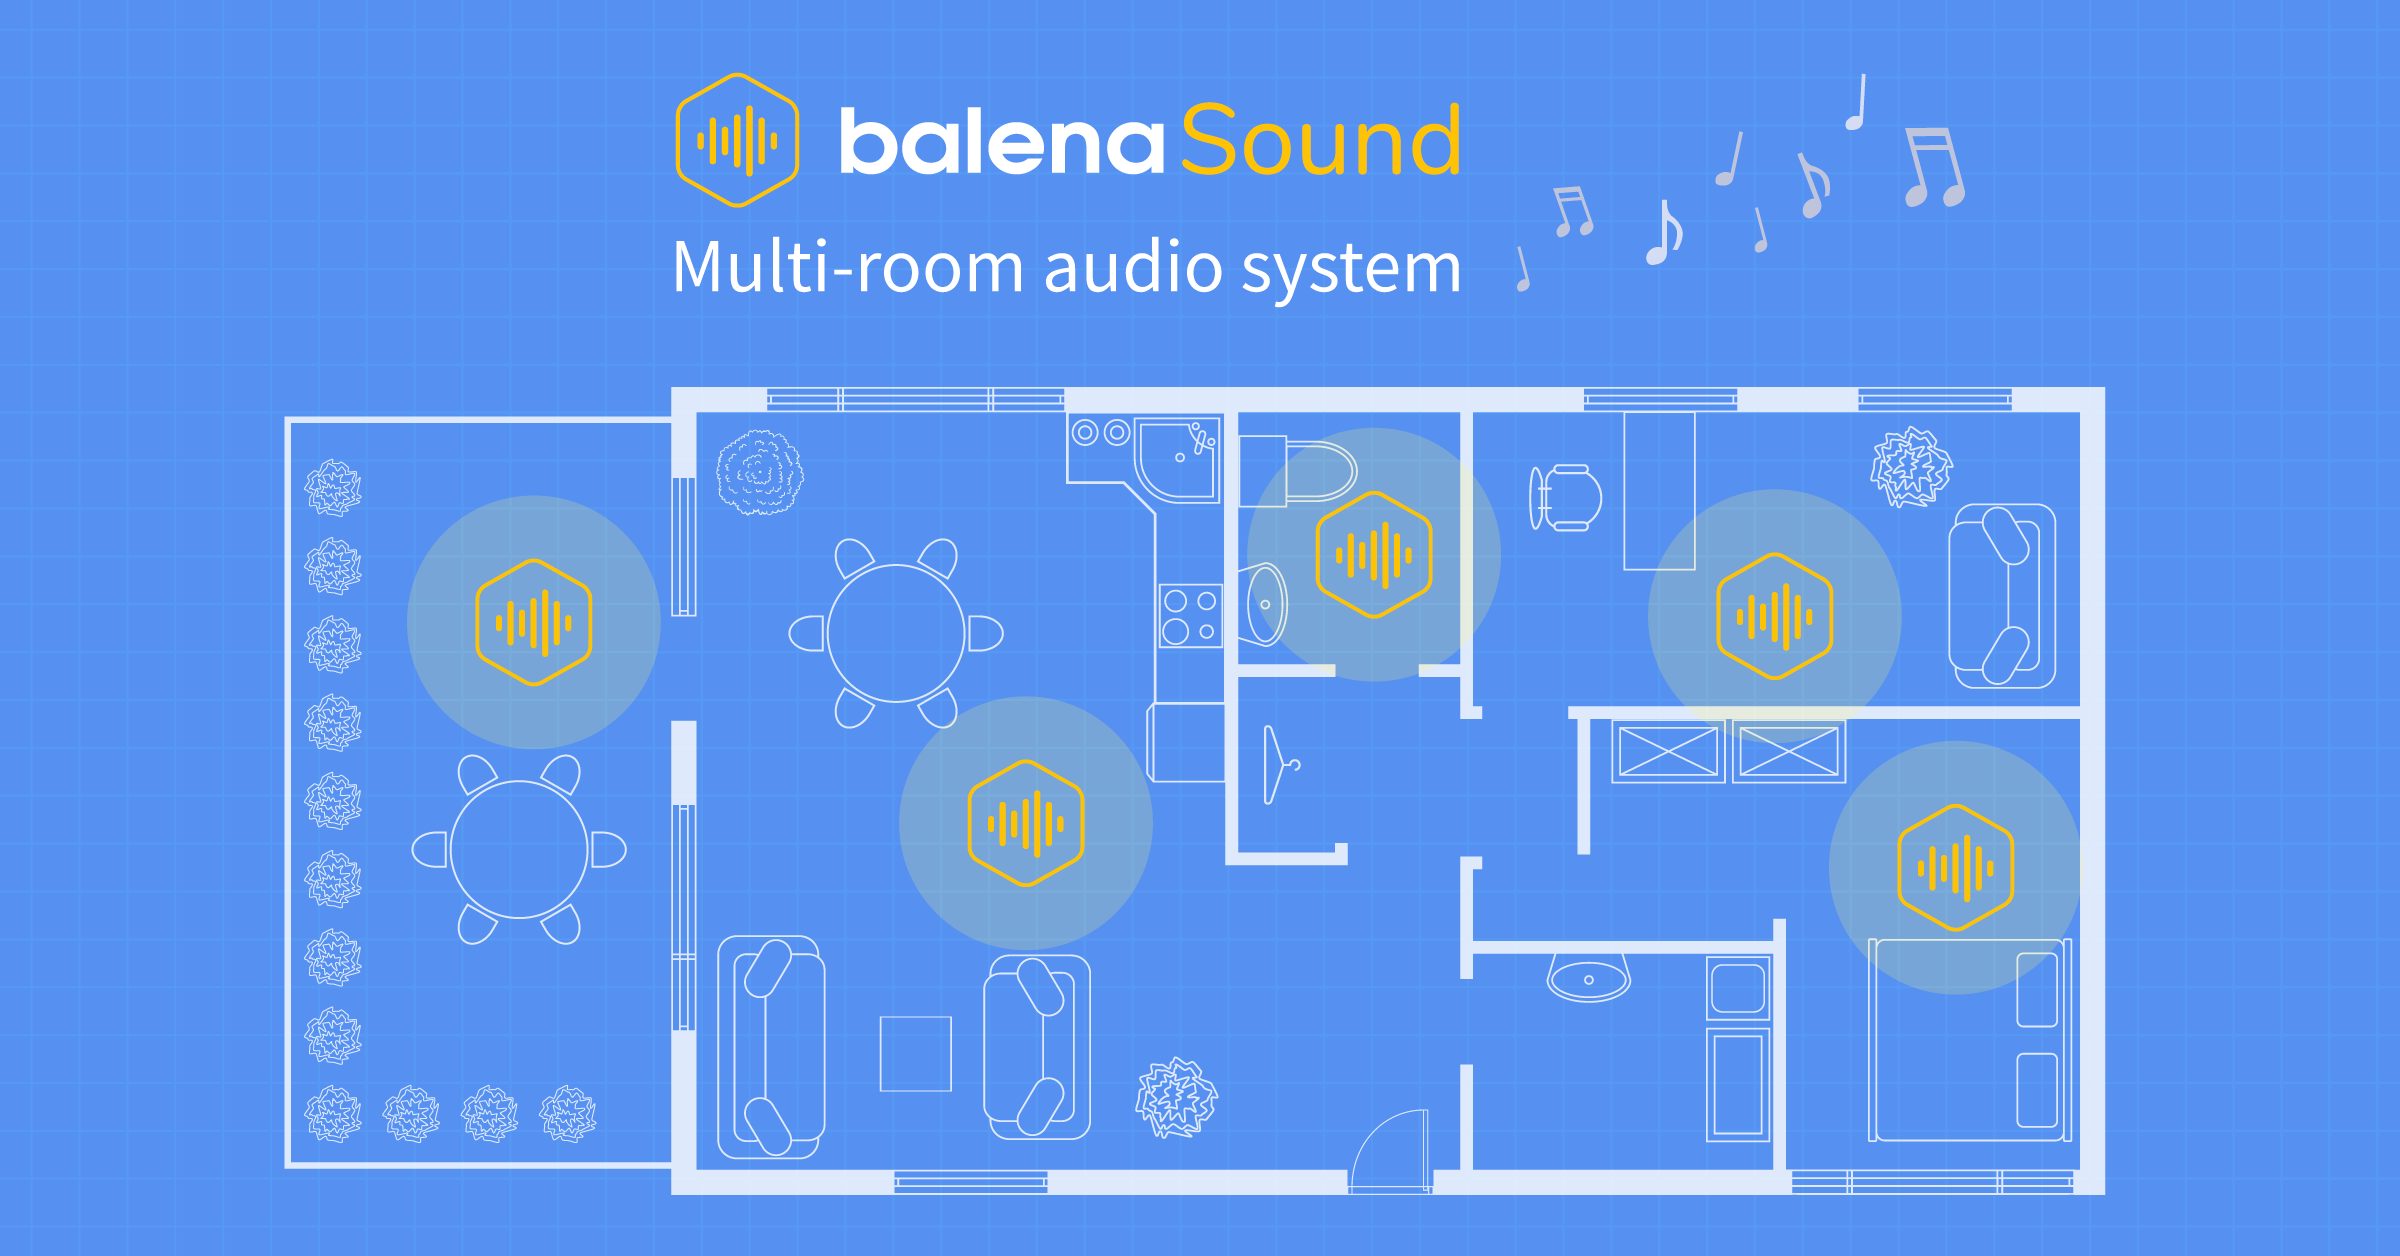
balenaSound already allowed you to stream audio from multiple sources with minimal effort. Now you can have a fleet of devices playing perfectly synchronised audio all over your place without paying a premium.
The latest version retains the previous functionality, but now, if you have more than one device, the audio will be seamlessly and automatically sent to all the other devices in your application.
If you have a couple Raspberry Pis and some spare speakers or an old stereo, you can build your own Sonos stand-in; read on and give it a go!

Your tunes are sent from your phone/laptop to all the devices in your app via WiFi.
Hardware required
For each room you will need the following:
- Server device: Raspberry Pi 3A+/3B/3B+/4B (device support table)
- Client devices: Raspberry Pi 3A+/3B/3B+/4B/Zero W
- SD Card (we recommend 8GB Sandisk Extreme Pro)
- Power supply
- 3.5mm audio cable to the input on your speakers/Hi-Fi (usually 3.5mm or RCA). Alternatively the HDMI port provides digital audio out.
- Optional DAC (compatibility list)
Note: the Raspberry Pi Zero cannot be used on it’s own as it has no audio output. To use the Pi Zero you’ll need the optional DAC HAT to get the project working.
Software required
- A download of balenaSound from GitHub
- Software to flash an SD card (such as balenaEtcher)
- A free balenaCloud account to setup and manage the Pi
- (Optional) Download and install the balena CLI tools – to be installed on your computer, allowing us to install the project code on the Pi
Tutorial
Provision your devices
In this guide we will only cover adding additional devices to your existing balenaSound application. If you want a detailed step-by-step tutorial on how to start from scratch you can check the original balenaSound guide.
The quickest way to get started
You can also use Deploy with balena to deploy balenaSound to a application within your balenaCloud account. Once you’re logged in, use this button:
Otherwise, read on!
A multi-room audio streaming solution is no good if you only have one device in your fleet. For this project we are going to add several devices to our application, each device will stream audio to a different room. If you are asking yourself, “how many devices can I add?”, the answer is a simple one. balenaCloud is designed to handle fleets with thousands of devices, so you can add as many as you have (or until you run out of rooms in your house)! Remember that for each device you will need a speaker, headphones or a Hi-Fi system to hear the audio.
In order to provision your new devices you need to:
- Download the balenaOS disk image from your application page on the dashboard
- Flash it to an SD card
- Insert the SD card and boot your device
If you already have one or more devices running balenaSound, make sure to add the new ones to the same balena application, allowing them to download the same software automatically. No need to flash the SD cards again, they can be upgraded to the new version simply by pushing the latest software over the air!
Note: You can mix device types as long as your application type supports it. A great way of maximizing device compatibility is to select Raspberry Pi 1/Zero as your application type. This enables you to add any board from the Pi family, and even the balenaFin. Read more about managing multiple device types in one application here.
When your newly provisioned devices boot, they will automatically register with balenaCloud. You should be able to see them on the dashboard:

Update balenaSound to the latest version
We now need to get the latest version of balenaSound pushed to our devices. It doesn’t matter if you’re updating your old balenaSound installation or working with a brand new one, the process is the same. To push the updated code we will leverage the power of balenaCloud to do so without even touching the devices.
First, you need to get the new code. Either git pull the changes from your local project folder if you kept it, or grab the entire codebase via a zip file download.
With the new code in place you can now push the update to your balena application by using the balena CLI. For a more in depth deployment guide you can check the original balenaSound setup tutorial. The main thing to note is that you don’t need to flash the SD card on your existing device again – just push the new code and it will update automatically!
Once the code is deployed balenaCloud will ensure all devices are updated to the latest version that you pushed. If you inspect a device on the dashboard you should see a few new services: audio, sound-supervisor, multiroom-client and multiroom-server.

Using balenaSound multi-room
Give it a try
And that is it! You should be able to connect to any of your devices and start streaming using any of the supported methods (bluetooth, AirPlay and Spotify Connect) without configuring anything!
Here is how to connect to a device:
- If using Bluetooth: search for the device on your phone or laptop and pair.
- If using Airplay: select the balenaSound device from your audio output options.
- If using Spotify Connect: open Spotify and choose the balenaSound device as an alternate output.
When you start streaming to a device, it will configure itself as the server and will broadcast a message to all other devices to synchronize them and start playing the same audio. Note: it can take a few seconds for the system to autoconfigure the first time you start streaming from a new server.
Troubleshooting balenaSound
Did you know that balenaSound now has documentation, a troubleshooting guide, and an FAQ? Learn more about the project or find ways to contribute by visiting the official balenaSound app site.
What next?
While you can use any device type (except the Pi Zero) as the master, it’s recommended that you use a Pi 4 (read more about the reasoning on the project main read me file). If you have multiple devices it can be hard to figure out which is which, so we are going to customize the device name of one of our Pi 4s so that we can easily identify it when trying to connect to it.
To do that we just need to add a device environment variable using the balenaCloud dashboard, set the variable SOUND_DEVICE_NAME to the name you desire:

Make sure you are only adding this variable to a particular device and not to the whole fleet (this is done from the device dashboard page rather than the application one).
One last quick tip, if you want to physically identify a device you can highlight it by blinking the onboard LED. This can be done by clicking the lightbulb icon on the dashboard:

Become a balena poweruser
Want to learn more about what makes balena work? Try one of our masterclasses. Each lesson is a self-contained, deep walkthrough on core skills to be successful with your next edge project.
Check them out at our docs. Also, reach out to us on the Forums if you need help.
Until next time…
Thanks for checking out this guide. We hope you were able to turn your place into a fully fledged audio streaming powerhouse!
If you had trouble getting the project running or have any other feedback we’d love to hear it; everything helps to improve our projects and tutorials for the next time.
If you would like to suggest new features or contribute more cool features to balenaSound feel free to drop by the GitHub repo.
You can always find us on our forums, on Twitter, on Instagram or on Facebook.
Join the discussion at forums.balena.io