
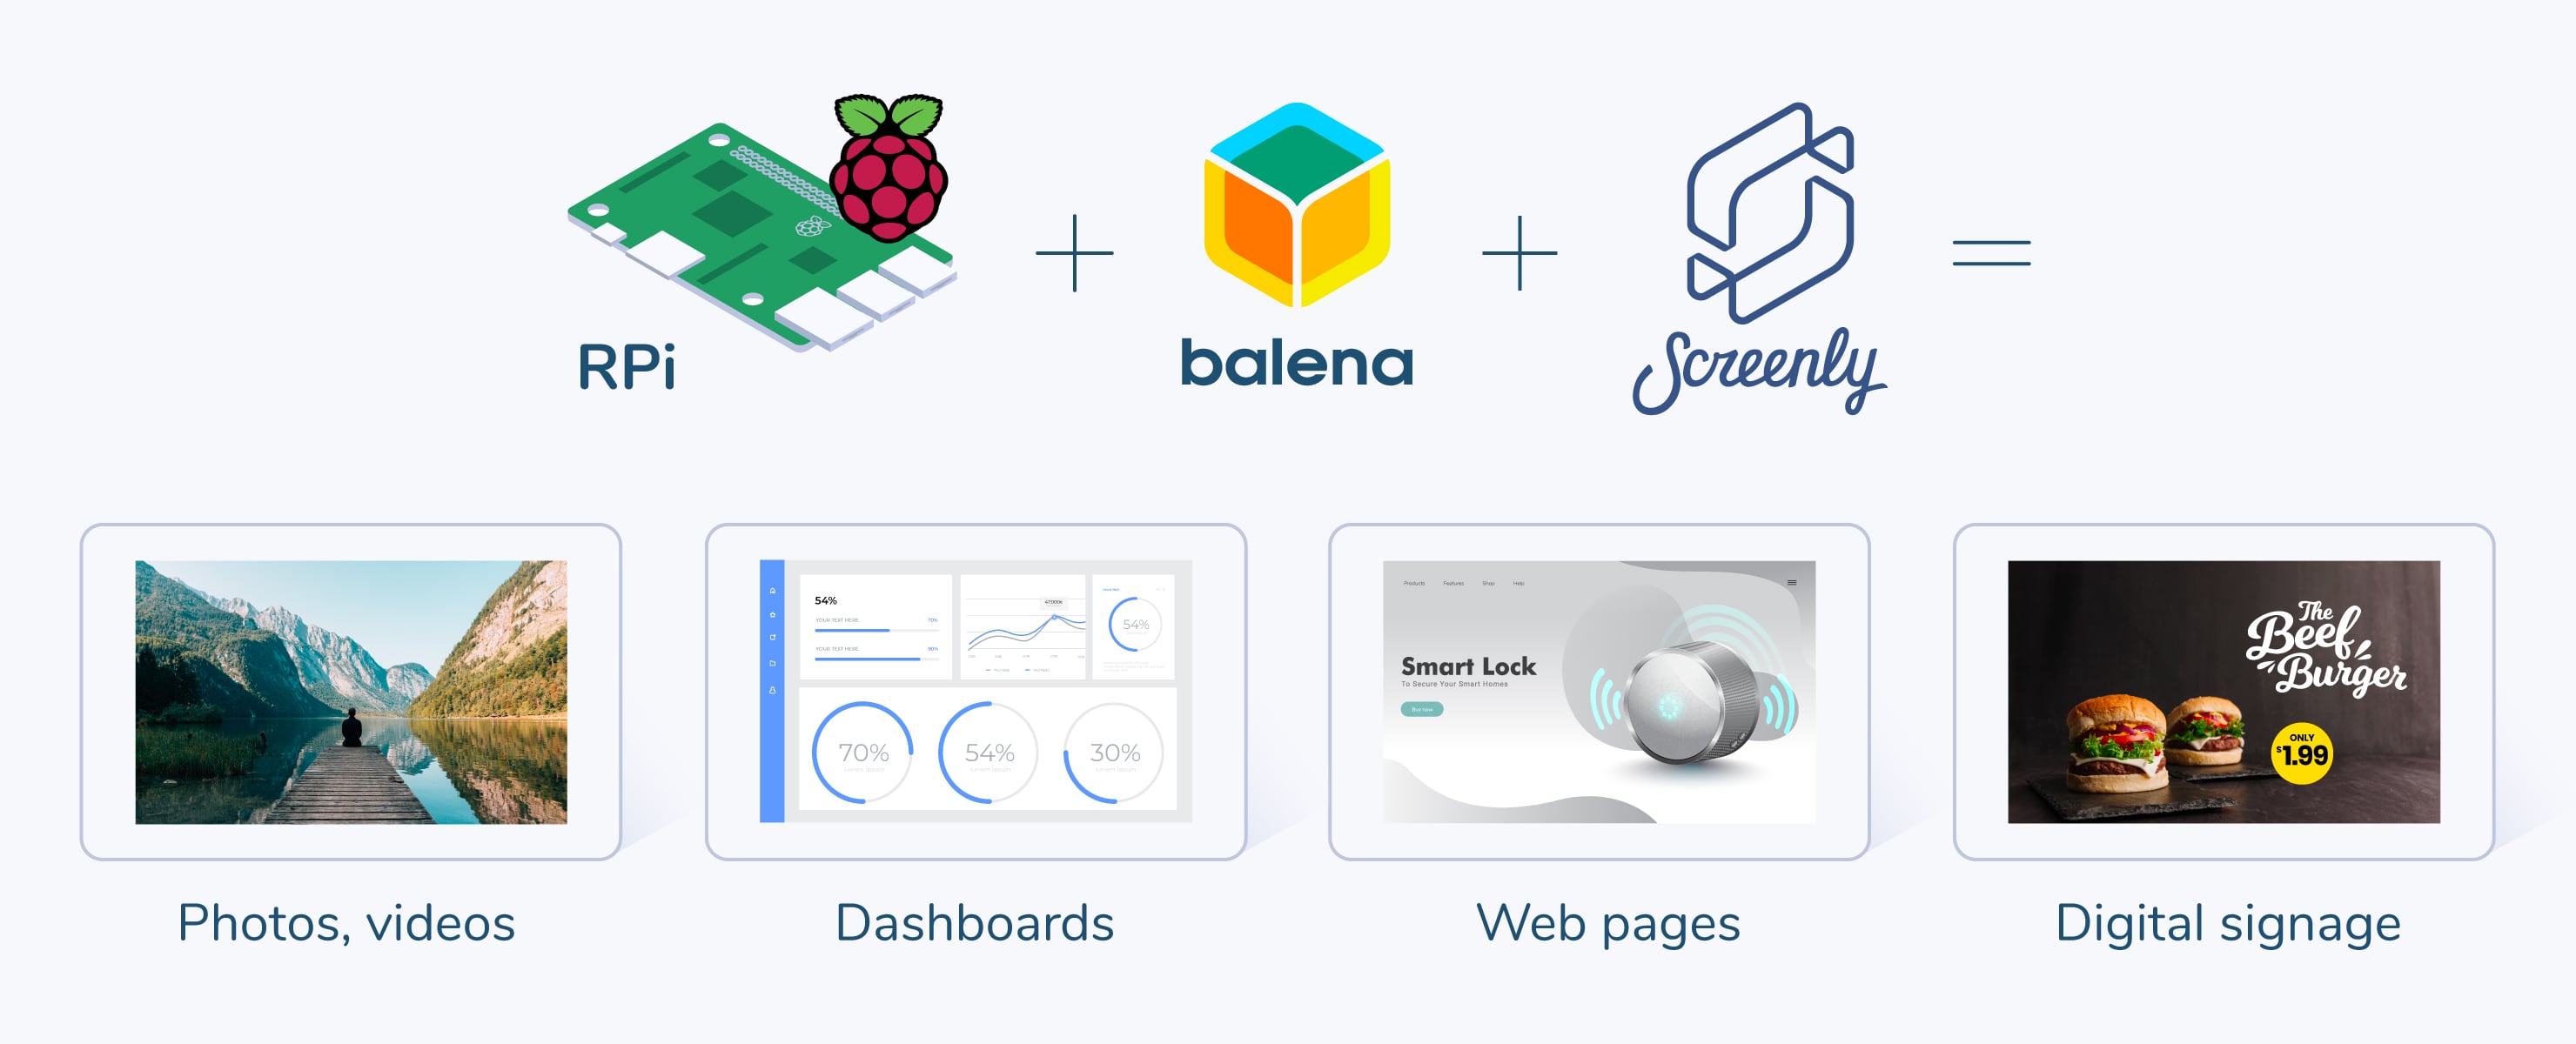
Try this project to get up and running with a display you can control remotely to display photos, videos, dashboards, web pages, and digital signage.
This tutorial was put together by the friendly folks at Screenly. They’ve recently updated their open-source digital signage software project to work seamlessly with the balenaCloud platform, enabling you to very quickly deploy and easily manage your digital signage no matter if you have 1 or 1,000 signs!
We’ll walk you through how to set up a digital sign using balenaCloud and Screenly OSE, the most popular open-source digital signage solution for the Raspberry Pi. After implementing this project, you’ll be able to display and manage images, videos, and even live web page content on a digital sign.
Before you start
Introduction
Digital signs help businesses better communicate with their customers and employees. Teams can use digital signs to show special offers to passing foot traffic, and teams can also use digital signs to display KPI metrics on their office walls. Digital signage is an exciting communication medium due to its always-on nature, which allows individuals to view and interact with digital signs easily during the hustle and bustle of their busy days.
To launch a digital sign, you will need digital signage software. This software helps you change out and manage the content on your display screen. If you are new to digital signage, management software may not be on your radar. However, it is a critical component of any successful digital signage strategy. Without digital signage management software, DIY digital signs can be difficult and time-consuming to keep up-to-date.
Below, we’ll teach you how to deploy our open source digital signage software Screenly OSE using balenaCloud. With balenaCloud, teams can manage their Screenly OSE powered digital signs from anywhere with an internet connection via the public URL feature. This remote-management ability is a game changer for businesses, as it allows employees to update digital signs from the comfort of their office desk.
Before we get started, note that there is a difference between Screenly OSE (our free digital signage software) and paid Screenly software. With the paid edition of Screenly, you can manage the content of multiple screens from a single interface and access advanced grouping features. To read more on the difference between Screenly OSE and paid Screenly software, check out our Screenly OSE vs. Screenly guide.
Hardware required
Regarding hardware requirements, most hackers and technology enthusiasts will have the needed components already. For hardware components that you don’t have, you will be able to purchase these components quite affordably.

Here’s a list of what you need:
- Any Raspberry Pi system-on-a-chip: The Raspberry Pi will process your content and render it to your screen. The Raspberry Pi 3 Model B+ provides the best performance (and is recommended), but simpler models, such as the Raspberry Pi Zero W, will also work just fine.
- A microSD or standard SD memory card: The memory card will store your cached content and the Screenly OSE software. A Class 10 or higher SD card will provide the best performance – we recommend Sandisk Extreme SD cards. A 16GB card will work for most use cases.
- A reader/writer for your microSD or SD card: Many computers have a built-in SD card reader/writer drive, however, some do not. If not, there are many SD card readers/writers on the market that can plug into your computer via USB.
- A display screen: This can include any TV or computer monitor with an HDMI port. If you are using an HDMI-compatible screen, you will need an HDMI cable to connect your screen to your Raspberry Pi device. Another great option for a screen is the 7” Raspberry Pi Touch Display, which connects to the Raspberry Pi’s DSI port via a ribbon cable. The Raspberry Pi Touch Display is a great desktop companion for testing out your digital signage before it hits your larger public screens.
- An Internet connection: Depending on your Raspberry Pi device, the Internet connection can be either an Ethernet or WiFi connection.
Software required
Just as you need hardware for this project, you also need software! Here’s what you need:
- A balenaCloud account: You can sign up for free here. You will use this account to manage your Raspberry Pi device and control the display remotely.
- balenaEtcher: balenaEtcher is a desktop application that you will use to flash the OS image from the balenaCloud dashboard onto your microSD or standard SD memory card. You can download balenaEtcher here.
- Screenly OSE: Screenly OSE is the open source digital signage management software that you will run using balenaCloud.
- balena CLI tools: You will use this command line application to work with your balenaCloud account and Screenly OSE. Download the balena CLI tools here.
Tutorial
1. Installing Screenly OSE on the Raspberry Pi with balena
Below we’ll walk you through each of the steps that are required for setting up your software and hardware. Pay attention!
Sign up for a free balenaCloud account
For users with under 10 devices, balenaCloud accounts are free. You can sign up here with a unique username and password or you can sign in with an existing GitHub or Google account.
Create a balenaCloud application
Once you’re inside your balenaCloud account, click the green “Create application” button near the top left-hand side of the interface. Next, give a name to your application (any name will do, just make a note of it for later!). Also, select the model of your Raspberry Pi device. You can select the “Starter” account package, as this account type is free and will have everything you need for your first few screens. Once you create the application, the main dashboard for the application will load.

Add a device and download the balenaOS disk image from the dashboard
After creating the application, the next step is to add a device. Click the “+ Add device” button on the top left section of the application interface. You will then see several options. Here’s some guidance on what to select:
- Select your Raspberry Pi model.
- Use the recommended build version of balenaOS.
- Select the “Development” edition of the recommended balenaOS version. The development edition has a variety of testing and troubleshooting tools that are often useful. Read more about the differences between the development and production editions here. If you’re confident you can go ahead and deploy the production image instead.
- If you plan to connect your Raspberry Pi to a WiFi connection, enter your WiFi username and password details. It’s a good idea to enter your WiFi network details even if you initially only plan on connecting via Ethernet, as it will save time if you wish to switch to WiFi in the future.

Once you select the configuration options, click the blue “Download balenaOS (~### MB)” button. This will download the custom balenaOS disk image to your desktop. This image is automatically built with the information required to connect your device with the application you just created so it’s important to use the download from the dashboard rather than anything you’ve downloaded separately.

Flash your SD card with the balenaOS disk image
After you have successfully downloaded the balenaOS disk image, you now need to flash this disk image to your SD card. Balena’s very own balenaEtcher is a great free tool for this purpose.

To flash your SD card, connect your SD card to your computer via an internal or external SD reader/writer drive. Open balenaEtcher, select the recently downloaded balenaOS disk image, and select your connected SD card as the destination drive. Next, click “Flash” to write the disk image onto your SD card. This writing process can take several minutes. Be patient!

After you successfully flash balenaOS onto your SD card, safely eject the SD card from your computer and insert the SD card into your Raspberry Pi. Next, connect your Raspberry Pi device to a power outlet. The device should then boot up with the balenaOS operating system. Once the device boots up, you will see the device listed as “Online” on the balenaCloud interface.
If you don’t see the device online, check out balena’s extensive troubleshooting guide. Also, check out the forums, as they have a wealth of useful information on any recent issues and the team are available to answer any questions.
Install the balena CLI tools on your workstation
If you already have (or can setup) npm on your machine, using the balena-cli npm package is most likely the easiest way to get the CLI tools up and running quickly. However, there are also standalone binaries and installers for Windows, macOS, and Linux available.
The documentation for the CLI tools is the best place to start, and covers the installation and setup of both the npm package and the standalone binaries.
When you have the CLI installed and working, the first step is to login to balenaCloud by issuing the balena login command:


Once you’ve reached this point, and have a working CLI which has been logged in to your account, you’re ready to start pushing code to your Raspberry Pi.
Downloading the project from Github
The next step is to download the code for this project from GitHub. Go to: https://github.com/Screenly/screenly-ose and download the project.

The blue button will download a .zip file of the project which you’ll need to unzip, but if you’re already familiar with Git you can use git clone in the normal way.
Pushing the project code to your Raspberry Pi
As you have the CLI setup and the latest code downloaded, you can now execute a single command to push that code to balenaCloud which in turn builds the Docker image and handles the process of setting it up and running it on your device.
From within the unzipped project directory, execute balena push <appName>, where appName is the application name you set back at the beginning of the guide. For example: balena push screenly.
Note: this push command can take around 15 minutes. This time-intensive step builds a disk image for you on the balenaCloud servers. Balena then pushes the built disk image to the balenaCloud Docker registry. Your Raspberry Pi device then pulls the disk image from your balenaCloud account. There’s a lot going on! If this step is successful, you will see an image of Charlie the unicorn appear in your terminal.
If you’re using Windows the use of git clone and balena push can cause issues due to line ending changes; we recommend using a combination of either the zip download of the project and balena push or if you’d like to use git clone then also use the git deployment method git push instead of balena push.

At this point, make sure that your Raspberry Pi is connected to your display screen via HDMI. Wait a few more minutes after you see the unicorn, and your display screen should then show a Screenly logo and a URL address. You can check the status of the software download from within the balenaCloud dashboard. At the displayed URL address, you will be able to access the Screenly OSE interface.

2. Configuration options
Once you have Screenly OSE deployed on your device, you must adjust the GPU memory of your Raspberry Pi in order to optimize content playback. To do this, click the “Fleet Configuration” tab on the left-side menu on the balenaCloud interface. On the Fleet Configuration menu, scroll down to find the RESIN_HOST_CONFIG_gpu_mem configuration item. Then, click “activate” to enable the item. Next, click the pencil icon on the right-hand side and change the value to 192. If you need more information there’s a guide to setting configuration variables here.
| Name | Value |
|---|---|
| RESIN_HOST_CONFIG_gpu_mem | 192 |

Enable public device URL for remote access
Another configuration option that is worth implementing is enabling a public device URL. This configuration option will allow you to access the Screenly OSE interface for the device from anywhere with an internet connection. This is useful for situations when a user needs to manage digital signage content when they are away from the digital sign’s local network.

To set up this configuration, click on the hyperlinked device name in the balenaCloud dashboard. Next, click on the toggle icon under “Public Device URL” so that the toggle icon turns green. You can then click the link icon to navigate to the public URL for your device. You may want to bookmark this link for easy access in the future.
While the public URL may sound like a simple add on to your balenaCloud set up, it is really an amazing feature. With the public URL, you are able to manage your digital sign from anywhere with an internet connection – from home, another facility, or even from around the world! Most digital signage platforms limit this functionality to paid plans. With Screenly OSE and balenaCloud, you can enjoy truly remote digital signage management for free!
3. Using the app
You can access Screenly OSE via the URL address displayed on your screen or via the public URL provided in the balenaCloud interface. Once you are in the Screenly OSE app, click the blue “+ Add Asset” app on the top right. Next, click “Upload” in the popup screen and select the image and video content you wish to upload. Note that you can also add URL links and display live web pages on your display screen.

Once your content is uploaded, turn on these assets using the right side toggle. This step will add them to the Active Assets list. You can edit the order of the assets by dragging and dropping them into your preferred order. Also, you can schedule the display time for each asset by clicking on the pencil icon on the right-hand side and entering scheduling details.

There is also a useful balenaCloud integration, which you can navigate to via the “Integrations” tab on the top right of the Screenly OSE menu bar. There you will be able to see details such as your balenaCloud Device Name, Device UUID, App ID, App Name, Supervisor Version, and Host OS Version.

4. What’s next?
We hope that you enjoyed this project and that you have your digital sign up and running! Check out our use cases page to learn more about what you can do with digital signage, such as making a business dashboard digital sign or setting up a Google Calendar digital sign.
Need help?
Troubleshooting
If you have any trouble with the Screenly OSE app, check out the Screenly Forum or the Screenly OSE issues list on GitHub. We have an active community that is always willing to help with troubleshooting issues!
Thanks to the Screenly team for writing this post and for taking the time to let us know how to deploy their awesome app using balena! If you decided to try Screenly both we and the team over there would love to hear how it went, similarly if you got stuck or have any questions, let us know in our forums at https://forums.balena.io, on Twitter @balena_io, on Instagram @balena_io or on Facebook. See you next time!
Join the discussion at forums.balena.io