
Recently, we posted a full tutorial telling you how to set up Pi-hole for network-wide ad-blocking on your entire network. Today we’re going to expand on that a little by showing you how to add a display to your setup for monitoring and statistics using PADD.

What you’ll need
For this guide you’ll need to be running the the Pi-hole on balenaCloud project by @klutchell that we used in our original guide. This project already includes all of the additional software components we’ll need to set up and run the display. If you’ve not set up your Raspberry Pi with this project yet, head over and work through the guide, then come back and we can continue on with the display setup.
Note: due to this issue you’ll need to run balenaOS 2.38 for this.
Next, we’re going to need some kind of display for the Raspberry Pi. In the original tutorial, I used a Raspberry Pi 3B+, and so I’m using an Adafruit PiTFT 3.5”. This is a reasonably common display available from a few different vendors so shouldn’t be too hard to obtain if you need to get one. Alongside Adafruit themselves, take a look at Pimoroni, PiSupply and Digi-Key.

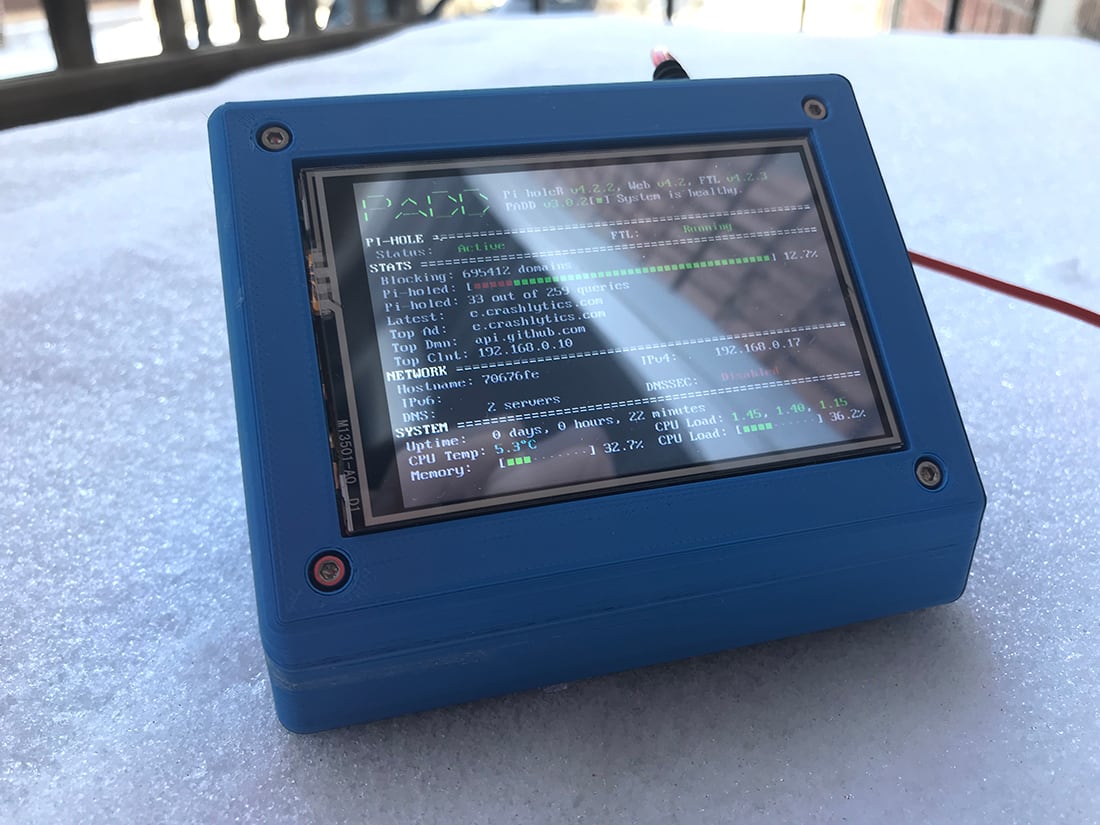
Although not strictly required for this project, I wanted a nice case to display the unit on my desk. I found the Pi TFT plus Console Case by arcmatt on Thingiverse which is designed to house the Pi along with the Adafruit screen in a neat little 3D-printable case.

The case has a cool feature where you can pause your print and insert some captive M2.5 nuts before resuming. This means you get really nice and secure fixings when assembling the pieces of the case. Additionally the design includes options for printing a base that includes a fan for cooling of your Pi if you need it.

For my own project I decided to print the model which includes a space for a 40mm fan. For this you’ll need to obtain a 5V fan which you can then drive from the same power supply as the Pi.
If you don’t have access to a 3D printer, take a look at the Pibow PiTFT+ from Pimoroni, which is available from Adafruit too.
If you’re interested in seeing the case build, we live streamed the assembly of this case and installation of the software on our Twitch channel @balenaio on the 1st March 2019. It’s archived on our YouTube channel and included below too.
Display configuration
Now that you’ve followed our original guide there’s very little left to do in order to enable the stats display.
The Pi-hole project includes the PADD software already, but it’s only enabled if it detects the PiTFT display connected to the system. Therefore, to get it up and running, we just need to add a few configuration variables in the balenaCloud dashboard to tell the system to load the driver for the screen and set the correct resolution.
All of the below values should be set in the device configuration within balenaCloud.
| Name | Value | Purpose |
|---|---|---|
RESIN_HOST_CONFIG_gpu_mem |
64 |
Note: this is one of the default options so you can edit the existing value. Allocates the specified amount of RAM (in MB) to the GPU. The minimum you’ll be able to get away with will vary depending on the resolution you’re running at. |
RESIN_HOST_CONFIG_dtoverlay |
pitft35-resistive, rotate=270, speed=25000000, fps=20 |
To load the driver for the display and set the rotation correctly (for my case – YMMV). |
RESIN_HOST_CONFIG_hdmi_cvt |
480 320 60 1 0 0 0 |
CVT means custom video timings, so we’re using this to set a custom resolution for the display. |
RESIN_HOST_CONFIG_hdmi_force_hotplug |
1 |
Setting this means the Pi will operate as if a monitor was connected via HDMI – we then copy the HDMI output to the PiTFT. |
RESIN_HOST_CONFIG_hdmi_group |
2 |
This is essentially specifying that we are working with a monitor rather than a TV |
RESIN_HOST_CONFIG_hdmi_mode |
87 |
Mode 87 is an unspecified mode allowing us to specify a custom one (with CVT above) |
After you’ve set these configuration variables and rebooted the device, the software should detect the display and automatically enable the PADD output. You should get output that looks something like the below.

Fine-tuning
Now that the display is up and running, we can do a little fine tuning of the output to get it to utilise the full display and look a bit better.
The output is quite compressed as the console uses a small font by default. We can change the font size to expand the output by editing the file /mnt/boot/cmdline.txt on the device.

Edit this file to include fbcon=font:VGA8x16 after rootwait; ensure you maintain a space between them.

Save your changes and reboot, and you should then have something like the below on your display.

This is a bit better in terms of readability, but alas now the output is too large for our display and the top few lines have been cut off. I mentioned in the configuration section above that the HDMI output is copied (via fbcp) to the PiTFT display. In order to gain a few more lines on the display we can drive it at a slightly higher resolution. This has the downside in that the pixel mapping will no longer be 1:1 and hence the display will not appear as sharp, but the benefit is that the full output will then fit on the screen.
To do this we need to increase the vertical resolution from 320 to 368 which gives us an extra 3 lines of display output. Alter RESIN_HOST_CONFIG_hdmi_cvt to be 480 368 60 1 0 0 0, noting the change in resolution.
After one last reboot, you should then end up with an output that looks like the below.

That’s it for this project. For a little future addition I’m planning to implement a display backlight timeout and utilize the touchscreen to wake it back up when you need to see the information. This will be pushed to the same project repo when it happens so make sure you keep up to date!
Thanks for reading! If you got your Pi-hole up and running with a display, we’d love to hear how it went, similarly if you got stuck or have any questions, let us know in our forums at https://forums.balena.io, on Twitter @balena_io, on Instagram @balena_io or on Facebook. See you next time!